I shall introduce my final evaluation by saying what a good learning experience this project has been. It has taught me a great deal about Unity and scripting within it, as well as a key skill for transferring models across from Maya - "batch baking". At times the project has been a nightmare and really tested my patience, but at others I loved what I was producing and it was very rewarding to see the progression that I was making.
I will now summarize the story of the project from start to finish, detailing the parts I struggled with and new elements I learned, beginning with creating this blogger account. I find the idea of being able to work in an online sketchbook is great, particularly for our course being very computer based . The main reason being that it is very quick and easy to use; unlike handwriting which takes probably 3 times longer and of course looks nowhere near as professional. It is also much easier to upload images where as usually I have to print them off, cut them out and then stick them in - a process which wastes project time unnecessarily. The only downside to this is there is no way of backing up your work other than printing the whole blog off - which in my case would use a huge amount of ink and paper! Throughout this project I have been terrified of accidently deleting my posts with no way of reclaiming the lost work - it would be a major setback and motivation killer.
The first step after creating our blogs was to research "casual games" as this would be the style our "carnival shooter style" game would be in. The essentially meant a relatively simple game with much depth but still entertaining for a brief amount of time nevertheless. A key skill here was to ensure that examples of games were compared with one another to gain a good understanding of what elements were successful and which were not - which could then be applied to our games from the start.
After carrying out the above research we were set the task of planning out some "initial ideas" - one of which would be developed into the final game. At the time the film "Cowboys & Aliens" was advertised everywhere as a new box office release which gave me the inspiration of a sci-fi combined with a western game (with western being the traditional element of a carnival shootout and the sci-fi being the modern twist). Also with sci-fi being my favorite genre - being a big Star Wars fan - it was a great opportunity for me to express my creativity combining it with something completely different. This was therefore my choice over my other initial ideas which I took into my "development of ideas" post, expanding on the original initial idea, giving more depth to allow for further research.
This further research became primarily images of western environments for scene inspiration, as well as some background research into the "Cowboys & Aliens" film including critic reviews and further information into the western sci-fi combination. This gave me a basis to begin my "initial design ideas" once I had completed a "game synopsis" - which specifically detailed what would be in the game and how it would work; essentially a finalized summary of the "development of initial ideas" post. The "game synopsis" was useful as I frequently referred back to it when putting all the pieces together.
Now it was time to start my "initial design ideas" which I began with the setting. This had been narrowed down to 3 possible locations including a western ranch, western town and western saloon. I drew these concepts in 2-point and 1-point perspective to give a better impression of how they would look in 3D space, taking inspiration from my research images to add in detail and therefore give a more realistic feel to the drawings.
I next moved onto the opponents - which taking inspiration from "Cowboys & Aliens" - were to be aliens. I thought that the most stereotypical alien to shoot at would be the "martian" character so I drew a quick sketch off the top of my head to demonstrate this idea. I found that without resources to work from I could not demonstrate the idea successfully, so I went back to doing research to gather more images relevant to the idea in mind to assist with my drawing. The outcome was practically exactly what I had in mind - even though the legs in the drawing were out of proportion (life drawing is not my strong point!).
All that remained to design for the game was the player weapon, which I had already decided in my "game synopsis" would be an old fashioned style rifle (to help clarify that the player was a cowboy/cowgirl fighting for their life). All I needed to do for this was to find an image of the right weapon which I decided was the "Winchester" rifle - it was pointless to draw it out when I intended on using an existing weapon, not my own design.
Finally the UI was the last consideration - which didn't need to be designed as such, merely researched and evaluated so that I had a good idea of what I would be doing with it when the time came. I decided that simple would be the most effective in this case, as too much information would clutter the screen and detract from the exciting atmosphere the game was to create.
With all these key elements now covered it was time to take them into Maya where they would be modeled and textured ready for use in the game. As I described in detail in my "development of initial designs" the only issue I came across - which was a big one - was getting the textures to remain on the models properly once exporting them into Unity. This issue took me literally 6 hours of research to find a solution - which was the process of "batch baking". This scanned the models in Maya, memorizing how the textures were laid out on the model and saved them.
It was around this time when I a new idea developed - with time running out and knowing the new skills I would need to teach myself to get my alien characters working as intended (animating, rigging etc.) where as this new idea would merely hover. This idea came about as a result of preparing music for my game - Daleks! As soon as I heard the Dalek theme whilst searching through soundtracks I realized what an atmosphere that music would create with Daleks entering the Saloon in time with the most dramatic parts. I did take into consideration that if I used somebody else's design would it penalize my marks but then I thought if i've modeled and textured it myself and have developed my own character previously then it would merely be a design decision to change. I made it clear in my development however that I take no credit for the Daleks and have referenced the music artist - Murray Gold - for the Dalek Theme soundtrack.
After completing all of the models and exporting them into Unity correctly I began work on setting up the game itself, which meant scripting. At this stage scripting was relatively new to me and I hardly understood what the code meant. All I could do was use the codes provided and if they didn't work correctly - which some didn't such as the bullet firing sideways and not colliding - I tried to find solutions on the internet. As I said, with my lack of scripting experience finding a fix was very difficult as I didn't really know what I was looking for. By the end of the project however I became much more familiar with how the code worked and what certain parts did, which gave me the confidence to add more code which we hadn't previously covered such as preventing the camera from rotating 360 degrees and creating a pause inbetween each gunshot so that the player could not fire quickly and therefore making the game too easy. All of the game development work has been thoroughly annotated and pictured in my "development of initial designs" post so I won't waste time repeating anymore of it here.
Something I forgot to include in my "development of initial designs" was the removal of the point scorer and cross-hair out of the UI. I had mentioned however how I wanted a minimal UI to prevent it from detracting the player from the "movie-like" atmosphere that I had created, and these removals were changes I decided on for this reason and forgot to note down. I wanted the player to feel like they were actually trapped in that Saloon being invaded by merciless Daleks - where they had to literally fight for their life. A cross-hair would remove this feel by making it very apparent that this was a game as in reality the character would not be seeing a floating red cross-hair to help them shoot their targets. Instead the player has to look down the rifle in order to aim accurately at their target. In regards to the point scorer I realized that it was no longer necessary as players could only hit the targets in the eye piece (now that the target had changed to Daleks). The countdown timer was the only essential part of the UI which being small and at the top left of the screen is relatively unnoticeable and doesn't cause this detraction from the atmosphere too much.
Another point I do want to mention about the "development of initial designs" stage is the amount of hours I had to spent animating the Daleks. Originally there were to be 14 of them but it soon became apparent how pushed for time I was and that this amount was too ambitious. I therefore reduced this number down to 9 - which also fit more comfortably into the 3 minute time frame. This did not mean I only had to animate 9 Daleks however as it became more like 15 - 20 with the amount of times an animation went wrong from start to finish and had to be completely redone. It was therefore incredibly relieving to see the last Dalek animating correctly, and it was at this point when I knew that the game was almost finished.
It was also these animations which held the game back and made me need a couple of days longer to complete the game otherwise it could have been finished for the original Friday deadline - but being a perfectionist it was important that they were not rushed and completed to the standard I strive for.
The only other issue I encountered towards the end of the project was whilst game testing. For some unknown reason, some of the Daleks would not be destroyed despite having a direct shot to their eye box collider. I suspect this was down to an invisible mesh of some kind obstructing the line of sight in places as moving these animations over seemed to resolve the issue. Even now on the completed game it is possible that this issue may occur at some point along the Dalek animations - but the game has been tested about 10 times and can be completed successfully. This is currently the only known bug that the game has.
Besides fixing the known bug above, the only other addition to the game that I would have liked to include would be a muzzle flash for when the rifle fires. To me that is really lacking and would add a great deal more realism had it have been included. I did however look into implementing this during the project and the tutorial seemed far too complicated at the time and with time running out I decided to leave that for a future project when I had more experience.
With a short amount of time left remaining with the deadline now extended I decided to have another attempt at this muzzle flash now I had more experience and confidence with using Unity and scripting. To do this I downloaded the Unity "FPS Tutorial" which is similar to the "Lerpz Tutorial" we completed for our first time on Unity. Apparently this tutorial explained how to create a muzzle flash - which it did - but not in the same scenario as my game. This game did not use projectiles as bullets and therefore had a completely different script - so as you can imagine trying to combine the two really didn't work. I thought long and hard about what I was trying to say in the script in an attempt of salvaging specific parts from this tutorial script, which got me to the point where I thought I had done it; clear of errors. Sadly though it wasn't right as the muzzle flash remained permanently on - basically the script was merely manipulating the muzzle flash "plane" which was textured, rotating it to appear as though different every time. Despite rotating on the wrong angle which could have been fixed - this did not resolve the issue of the plane being visible permanently, and I didn't quite know how to call for it in the script and then hide it again after say 1 second. After a few hours of this I decided to once again put this idea to rest and leave it for a future project when I would have more knowledge and experience of code and scripting.
Overall the project has been a good learning curve for me - I have encountered problems and then searched for a solution - learning more and more throughout this process. I am now much more confident with scripting in Unity than before, as well as my animating skill due to so much repetition. I have been allowed to fully express my creativity with designing the project from start to finish, without any restrictions except for what our skill level would allow for in Unity and Maya. With my new skills and knowledge acquired at the end of this project I will now be able to apply them to the next project where I will hopefully expand upon them further in order to create a better game with more depth and entertainment value. Without a doubt this has been the most enjoyable and rewarding project of this half term - and although I don't intend on going into games design in the future it has allowed me to express my love for 3D animation and atmosphere within a 3D world, particularly as it was essentially my favorite genre; sci-fi.
Please note: the research post has been moved down into "older posts" - it isn't missing.
Sunday, 23 October 2011
Monday, 10 October 2011
Development of Initial Designs
The Saloon
With the battle damaged Saloon chosen as the setting for the game, it was now time to take the design further and begin to add the element of 3D. Within Autodesk Maya I began to model the set directly from the perspective drawing, focusing on the main feature wall (the entrance) first; rendered below.

Using the "Mentalray" rendering engine I was able to showcase the model with sunlight and shadows to help add some realism to an untextured model.
The next step was to include the 2 side walls, one of which shows sign of damage from the alien attack. To achieve this look I added several "edge loop" lines to give me a range of vertices to play around with - this was to create that jagged uneven effect which my research showed me. The downside to adding these edge loops was the increase to the poly count - which for a game needs to be as low as possible for optimum performance.
Finally it was time to add the roof, and using the same technique as the previous wall add a damage hole (another line of sight for an alien target); rendered below.


With the Saloon structure now modeled, the next step was to model the contents of the room such as the bar, chairs, tables and rubble. Before this though I decided to jump ahead a bit and begin with texturing the Saloon walls as this is what really makes the model come to life.
For textures I used one of my research images as a referance to get a general idea as to what kind of materials western interiors contained. I concluded it was generally a mix of brick and wood, which is what I applied to my model below;

I first went for a green wooden trim - which I took from the reference image in my research. I found that this did not suit the mood of the situation at all - it looked too friendly. Instead I wanted a dark hostile atmosphere, so I changed it to a dark shade of brown, pictured below;


The next stage was to import the Saloon into Unity, as I decided to add the furniture etc. afterwards. Little did I know how many problems this would cause, and took me roughly 6 hours to solve. I firstly exported the model as an "fbx" format which is most friendly for use in Unity. My first problem was that multiple models (and fragments of the model) were imported on top of the actual model, so at first I had to delete my way through until I found the correct one (pictured below);

The next problem was the texture had not imported in properly - only 2/5 had saved onto the mode (also pictured below);

This was the main problem I had to try to solve, and after the many hours searching the internet for people with the same problem I finally found the technique of "baking textures", in particularly "batch baking" using the Mentalray rendering software. This took a while to complete, and once I then saved the model again as an fbx and imported it into Unity, all the textures were loaded with it and in the correct places. However, this did not work 100% correctly as some small areas such as on the window frames are still the standard lambert shade instead of the dark brown - but this is unnoticeable from the first person controller so therefore not an issue.
Here is where I found my fix - and I would like to thank this person for saving my project: http://www.stephenglover.info/maya-to-unity-bake-textures-and-lightmaps-for-export/
The below image is the corrected model now in Unity;

My next step was to add some lighting back into the scene. I first used a directional light to act as the sun which I placed infront of the camera looking through the windows. This did not provide enough light (or at least not in the way I wanted it to) so I also added a point light which I placed in the center of the room and adjusted to the correct intensity and colour tint to produce the desired effect. I also added a plane of sand outside the entrance for the enemy targets to walk on;

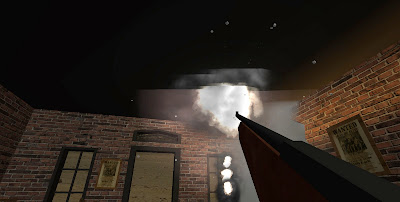
I then added a suitable backdrop to replace the blue background, similar to the one in my initial design drawing. All that was left then to complete the scene (without furniture models) was some particle effects to show that the structure had just came under attack. This would also provide some cover for the alien targets moving outside the structure, making the game that bit more difficult;


With the battle damaged Saloon chosen as the setting for the game, it was now time to take the design further and begin to add the element of 3D. Within Autodesk Maya I began to model the set directly from the perspective drawing, focusing on the main feature wall (the entrance) first; rendered below.

Using the "Mentalray" rendering engine I was able to showcase the model with sunlight and shadows to help add some realism to an untextured model.
The next step was to include the 2 side walls, one of which shows sign of damage from the alien attack. To achieve this look I added several "edge loop" lines to give me a range of vertices to play around with - this was to create that jagged uneven effect which my research showed me. The downside to adding these edge loops was the increase to the poly count - which for a game needs to be as low as possible for optimum performance.
Finally it was time to add the roof, and using the same technique as the previous wall add a damage hole (another line of sight for an alien target); rendered below.


For textures I used one of my research images as a referance to get a general idea as to what kind of materials western interiors contained. I concluded it was generally a mix of brick and wood, which is what I applied to my model below;

I first went for a green wooden trim - which I took from the reference image in my research. I found that this did not suit the mood of the situation at all - it looked too friendly. Instead I wanted a dark hostile atmosphere, so I changed it to a dark shade of brown, pictured below;

Although it is difficult to see clearly in the render, the outcome was far more suitable for the theme. The next texture issue came from the bricks - having already modified them once for being too bright, they still didn't give the correct mood that I wanted the scene to give. I therefore took them back into Photoshop where I made them even darker and saturated some of the red coloring out. The end result was a much more desired effect, so I did the same with the floor to match. After correcting the existing textures I decided to colour the roof in the same dark brown as the doors and windows to match, then finally moved onto the last remaining areas - the burnt out holes. For the roof hole I used a burnt wood texture which I acquired from www.cgtextures.com (which is where I download all of my textures from) which I adjusted in Photoshop to my liking in terms of brightness. For the wall hole I used the same brick texture I used on the actual wall, but painted black over the top in Photoshop to make it appear burnt. The final result is below;


The next problem was the texture had not imported in properly - only 2/5 had saved onto the mode (also pictured below);

This was the main problem I had to try to solve, and after the many hours searching the internet for people with the same problem I finally found the technique of "baking textures", in particularly "batch baking" using the Mentalray rendering software. This took a while to complete, and once I then saved the model again as an fbx and imported it into Unity, all the textures were loaded with it and in the correct places. However, this did not work 100% correctly as some small areas such as on the window frames are still the standard lambert shade instead of the dark brown - but this is unnoticeable from the first person controller so therefore not an issue.
Here is where I found my fix - and I would like to thank this person for saving my project: http://www.stephenglover.info/maya-to-unity-bake-textures-and-lightmaps-for-export/
The below image is the corrected model now in Unity;

My next step was to add some lighting back into the scene. I first used a directional light to act as the sun which I placed infront of the camera looking through the windows. This did not provide enough light (or at least not in the way I wanted it to) so I also added a point light which I placed in the center of the room and adjusted to the correct intensity and colour tint to produce the desired effect. I also added a plane of sand outside the entrance for the enemy targets to walk on;

I then added a suitable backdrop to replace the blue background, similar to the one in my initial design drawing. All that was left then to complete the scene (without furniture models) was some particle effects to show that the structure had just came under attack. This would also provide some cover for the alien targets moving outside the structure, making the game that bit more difficult;

With the scene now complete apart from furniture models, I thought I would make a start on getting the game working incase time ran out for some reason or other. I therefore needed to begin with making the player's weapon and it's bullet, so I returned to Maya to begin with the modelling.
With the game only being a casual game the detail didn't need to be high - therefore it took no longer than an hour to model both the bullet and the player weapon, both rendered below;


With the player weapon I knew that only the front half would be visible from the 1st person controller so I therefore saved time by leaving out the back of the rifle. The textures were also very simple yet effective - particularly the wood on the rifle. Again credits go to www.cgtextures.com for the downloads. Below is the rifle attached to the 1st person controller in Unity;

By this stage I could see that the project was well on the way - considering the previous day I was having major importing issues which threatened the project being completed for the deadline. However, the problems did not end there - when it came to getting the bullet to fire again I was faced with a dilemma. This was not the first time I had faced this issue though, as when we had previously tested out a shooter within session the same problem happened then. This was where the bullet would fire, but fired sideways. From my memory I remembered rotating the spawn point would change the direction of the shot - which indeed it did, but then I was still faced with the problem of the actual bullet being projected in a sideways angle and not ahead - image below;

As with before I turned to the internet to try and resolve the issue, but after an hour or so I had no luck. I therefore decided to invest my time more wisely and return to the modelling for now, as it was an issue that could probably be corrected within session.
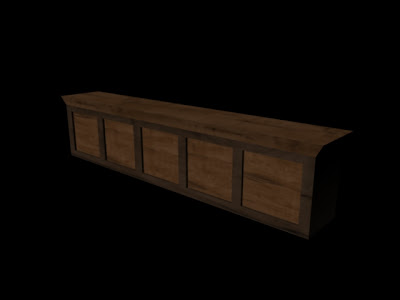
All that remained was to model the furniture for the Saloon and the alien targets. With the items of furniture being easier and quicker I got started with those, firstly with the bar counter, rendered below;

Using my research images of western saloons I was able to get a good representation of the western style, such as on the bar counter above. They generally used simple decoration such as rectangular "cutouts" in a slightly different shade of wood. This made the modelling very easy and not too time consuming.
The next piece of furniture I made was the chair, rendered below;
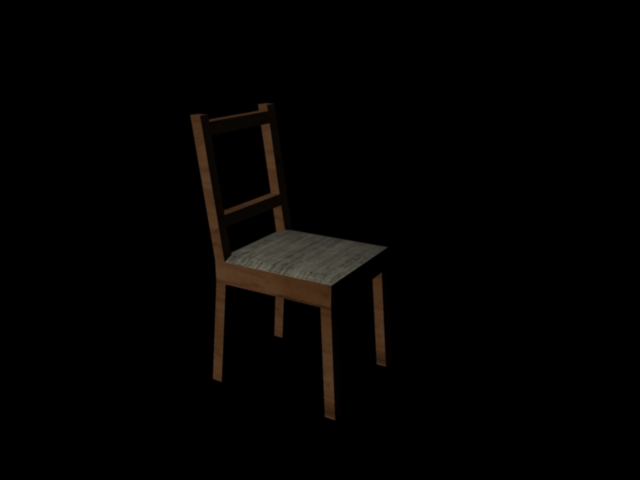
Again a very basic design thanks to western architecture. I used one of the wood textures that I used on the bar to create some consistency - this ensures that the same theme is apparent throughout the structure.
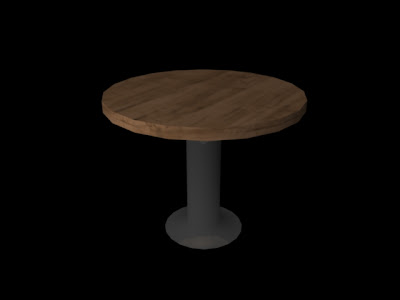
Next was the table;

Again using one of the wood textures from the bar, and for the table support I used a blinn texture for that shiny metal effect - similar to on the player rifle. Considering that there should be a table where the wall has been blown in I decided to modify the original to create one that appears as if it has been in the blast, rendered below;

By this stage the room was starting to look believable, but for that extra realism I decided to make some extra models such as candles for the tables (which would also be used to project a light source) as well as a wanted poster to help set that wild western scene. Both images rendered below;


Knowing that the candle would be particularly small I didn't worry too much about the textures and used colours instead. For the wanted poster I added a wooden frame to it to match the rest of the wooden furniture in the room and added a realistic looking image for the poster itself, displayed below. The use of the realistic image really helped to bring the scene that bit further to life, despite the game only being "casual" where detail and realism aren't that important.
The end result of adding these models into the scene is below - a big change to the last image of the scene;

As you can see the scene is also a lot darker which came about after an inspiration I had from a soundtrack I found for the game. This was the "Dalek Theme" from Doctor Who, composed by Murray Gold;
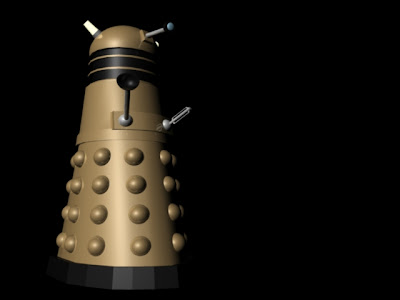
I found this composition so inspiring that it effected the design of my project - instead of fighting off the martian enemy character that I had designed, it would now be to survive an attack from the Daleks! I realized that this would be far more suitable for the project as the Daleks dont require rigging and animation - they simply hover. With me having no experience with rigging and animating yet this was ideal as time was running too short for me to self-teach those skills and put them into practice. I therefore got straight to work on modelling my Dalek target, which I must stress that I take no credit for and is intended for educational use only.

To assist with my modelling I used the above image of a Dalek toy which was really useful being in 3D. Although the Dalek shape isn't that complicated, I did struggle with certain areas such as the base and it's alignment to the upper structure. However after a couple of hours I had a model I was pleased with, rendered below;

Once I imported the model into Unity there was one important addition I wanted to make - a blue light source coming from the eye, pictured below. Not only did this make the model come to life in contrast to the dark surroundings but it also illuminated the target area (Dalek's could only be destroyed by shooting their eye piece). This therefore added more variation and difficulty to the game - the player has to shoot the Dalek eye accurately to be able to destroy it.

The next step I worked on was to animate the Daleks. I already had a good idea in mind of how I was going to do this so it was just a matter of implementing my idea to the scene. Having already had some animating experience from class within Unity I didn't encounter many problems. One problem that did occur however was once I made my startup screen - when I returned to the game scene after linking them the animations had strangely changed and moved, so I therefore had to reprogram them again.
By this stage I was now struggling to make any more progress on the game level. I had now encountered numerous problems which searching the internet was not solving, so I compiled the following list of issues which I needed help with in class the following day;
- Restricting camera movement so the player can't look behind.
- The bullet projects at a sideways angle.
- Colliding issue; the bullet doesn't collide with anything in the scene and goes through.
- Collision to Dalek eye piece to cause object destruction with particle effect.
- Spawn points for Daleks.
- Rifle muzzle flash.
- Colour won't stay on 3D text (start screen) and reverts to default white after saving.
The following day my teacher Mark managed to help solve some of the issues, the first being the colliding issue. It turned out that the problem was really simple - the bullet itself had no mesh collider which explained why it passed through all other colliders. I was under the impression that a rigid body acted as a collider which turned out not to be the case.
However, the problems became more complicated when it came to colliding with and destroying the Daleks via the eye piece. The Daleks could be destroyed by shooting them normally, but to destroy the eye piece which was a child of the Dalek object was other matter. It required a script to make this work, which was figured out after an hour of experimenting with code.
By this stage the game was really starting to come together now that the main technical issues had been resolved. The next stage was again visual effects, adding a particle system so that an explosion was created after the removal of the Dalek game object. These particle effects were also provided by Mark who showed me how to apply them to the game (and script). The effect is displayed below, however note that the animations of the Daleks once again moved out of sync which needed fixing.

The explosion effect was not quite right however and needed some tweaking. In order for the effect to look believable it needed to consume the full outline of the Dalek object so that when it was removed from the scene it wouldn't look as if it had just vanished into thin air. Below is the improved explosion;


The only issues remaining now were;
- Restricting camera movement so the player can't look behind.
- Spawn points for Daleks.
- Rifle muzzle flash.
- Colour won't stay on 3D text (start screen) and reverts to default white after saving.
I decided to move onto the next most important part - the respawning. Instead of actually respawning I decided to have a set amount of Dalek's at the start of the game and using animation I would bring them to the scene individually.
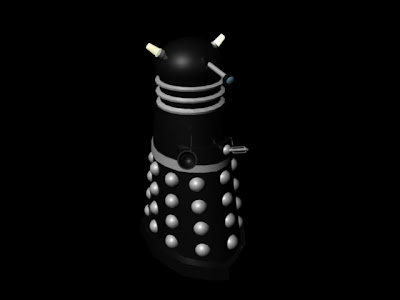
Before I did this however I decided to take the Dalek model back into Maya as I realized they were missing a key feature which was bugging me, displayed below;

...the lights mounted on the top of the heads. The originals I made didn't quite look how they should do because of this so I had to make the addition. While doing this I decided I would add some alternative colours so that the enemies varied and the game would be more interesting. All 3 colour variations displayed below;


With the models finished and imported it was time to do the animating technique I previously mentioned. By placing the Daleks far away to begin with I shall animate them into the scene at the appropriate times as we have not yet learned how to respawn mobs. The game needs to finish by the time the soundtrack does, which is exactly 3 minutes long. This will determine how many Daleks and animations I shall be adding.
Before completing all the animations I added in the UI timer which would be useful for timing the animations correctly. This however was challenging at first to position in the correct place in relation to the screen - as this varied by different screen resolutions. I therefore only had to ensure that it was positioned correctly for the web browser version which meant repeatedly building the game and then going back into Unity to make the alterations.

The only game play issues I had left remaining which were important to fix were;
1) The problem of the camera spinning 360 degres revealing an empty scene behind the player.
2) The player was able to fire continually which was unrealistic for the type of weapon and made destroying the Daleks too easy.
For the first issue I had already looked into it previously and not been able to resolve the issue, but it was a too greater part of the game play to leave unresolved. I therefore began to research again determined to find a script that could fix the problem, and to my relief I did manage to find one. It turned out that the original Unity "mouselook" script was faulty which explained why altering the restrictions in the inspector made no difference. It was therefore just the case of replacing the original script with a corrected script. However now that it did work the next step was to figure out which digits would restrict the camera to the radius that I wanted - this was much more of a challenge then it sounds and took at least 15 minutes to keep experimenting with different numbers to finally get to the angle I desired.
The second issue was not such an easy fix - it was a matter of searching for a part of a script that would slow down the rate of fire of a weapon; which would have previously been too difficult for me to do with lack of scripting experience - but now I felt more confident to experiment with it. I found numerous scripts which claimed to slow down rate of fire however many of them had so many errors once I combined them with my own shooting script that I kept looking for more. Eventually I found one that was explained in more depth than the previous which helped me work out how I could successfully combine it to mine - and after playing around with the script sorting errors here and there it actually worked - I was amazed! Now the weapon had a timer between shots and until this reset to 0 the weapon would not fire - this worked perfectly for my rifle sound effect which does a cocking noise after the gunshot.
With the above issues resolved all that remained to complete the game was the start screen, the lose screen and the win screen. I created these using the images I had already included in my game with the exception of the start screen which was an image from my research.

Displayed above is the lose screen which as you can see is red to symbolize defeat - and below is the win screen which as you may expect is green for victory. For all 3 screens I used a combination of a western font and a sci-fi font to further incorporate the mix of the genres, which I thought worked really effectively. The music chosen for these screens are also very fitting - for example a heroic song for the win screen, a sad song for the lose screen and for the start screen the typical cowboy western theme. Credits go to Murray Gold again for the win screen music (I Am The Doctor) and the lose screen (Doomsday).

All that remained in terms of making the game was to alter the countdown timer script to switch to the relevant screen for the right reason which was a simple matter of adding in some code already provided to us. Next it was time for game testing which was carried out by my girlfriend aswell as myself - which totaled approximately 20 full tests - which unfortunately did reveal problems. These shall be revealed in the final evaluation.
Sunday, 2 October 2011
Initial Designs
The Setting
Here is my first initial design idea for the "western ranch" set. It has been drawn using 2-point perspective to include more views than 1-point perspective would. However for the purpose of the game, 1-point perspective would probably be more suitable - similar to a shooting range where the room appears to get narrower in the distance (as featured in most shooter games from research). The main issue with this design is the limited places for enemy targets to appear from. With the barn only having 1 window and door, the main feature of the scene has 2 target locations - hardly the main focus of attention. The surrounds offer more hiding places such as the cart, rocks and foliage, which in my opinion makes the barn unsuccessful. If I were to develop this design further, it would be to add more windows (or holes of some kind) so that the player can focus on the barn as the main area of attack - as it should be.

The next initial design idea depicts a "western town" again in 2-point perspective to show all the possibilities that the scene could allow. This set is more built up than the "western ranch" and would require more 3D modelling and texturing - this is an important factor to consider for project time management. The positive of this design however is the amount of places an enemy target could appear from, such as within the many windows, behind columns, inside doorways, behind barrels etc. As mentioned however, the amount of time this design would take to create may make it obsolete and not relevant for this short project.

Lastly is the "western saloon" set idea. Instead of using 2-point perspective as I did with the above concepts, it was time to test out 1-point perspective - which as I initially thought - is far more suitable for the style of the game than 2-point. Firstly 2-point wouldn't have given the effect that I had in mind - the fear factor of an exposed entrance looming in front of the player, and secondly I only wanted to describe the inside of one room so scale was irrelevant. The only reason that I used 2-point for the previous designs was it allowed me to display the size of an area effectively and to include details which 1-point wouldn't have allowed for - such as some side angles and aerial views.
Taking game play into consideration I decided to add more "peep holes" into the scene which are intended to be the result of the alien attack. This allows for more targets to be in the scene at one time therefore making the game more challenging, as well as helping the player understand what is happening - they're under attack!

As you may have noticed in all of the above images, my research into these 3 different locations and the images which it contained were a huge influence on the overall outcome. I took specific elements from each image and combined them with my own ideas to create scenes which resembled the theme I wanted; western.
My preferred scene after drawing out my ideas is the saloon, mostly because it immerses the player into the situation the best (a cowboy or cowgirl fighting for survival). I only realized after comparing the 3 designs that the previous 2 (the ranch and the town) don't describe this situation very well - instead they describe that aliens belong to the western structures and are being invaded by the cowboys/cowgirls (as they are firing into the structures from the outside). Realistically, the inhabitants of the structures would be defending themselves from the inside, as the saloon scene describes. It also is the most sensible to create in terms of time and the approaching deadline.
To help with the developed final version of this design I will need to research images of damage to structures - perhaps from places involved in wars. This will then give me a reference to help get this effect correct - instead of trying to create this off the top of my head. Other than this I currently have all of the images that I need in my research to help create this scene as it should be.
The Opponent
With the set design now decided upon, the next part of the game to design is the alien invaders. As I have previously mentioned in the game synopsis, the concept in mind was the typical "martian" with a large head and small body; featured below.

To begin with I created this quick design completely off the top of my head without any reference material to get an idea of what I needed to research in order to create a better picture of these characters.
Firstly the martian body shape needs to be researched - will the body be thin and frail in comparison to the large head or will they remain in relative proportion? Some different alien physiques would be useful.
Secondly, the clothing. A typical space jumpsuit will suffice to represent these characters, combined with my personal input - the cloak. A selection of images of space jumpsuits and similar attires will help greatly.
Thirdly and lastly, the weapon. As long as it looks relatively futuristic then it will be successful. It doesn't need to be complicated due to the time left available to complete the project, so something similar to the weapon drawn above will suffice. Some images of futuristic weapons, preferably rifles are required.
Using the new research of reference images detailed above, I have combined the elements to create the following development of the previous initial idea, featured below.

This combined result is exactly the idea I was working towards - a battle frenzied martian, equipped with sci-fi clothing and weaponry. The end result of this in the actual game may be a more simplified version - depending on the time remaining to complete the project. With the character being a humanoid figure it will ideally need to be rigged and animated (a skill I have never done before) for use within the game, else the character will be static and float. This may or may not be an issue - for example moving past the windows outside the saloon the legs would not be visible. As I said, time will be the deciding factor.
Player Weapon
As I discovered in my research, the ideal weapon for the player is the famous "Winchester" rifle - a simple yet typical western weapon. This single shot design will force the player to choose their targets carefully as opposed to holding down the mouse button for rapid fire like many casual shooters allow for.

User Interface
The final element of the game which needs to be designed is the UI (user interface). The main feature of the UI is to tell the player important game information such as a time limit or an ammunition count. As described in the final game synopsis, the game will conclude once the time limit expires - symbolizing the end of the enemy attack - so a countdown timer will be needed. Also a points total should be visible so that the player can see how well or how poorly they are performing. These interfaces should not obstruct the player's view of the scene - which is something to bare in mind. Some research of shooter UI's would be useful to assist with designing.
Having now conducted some research into UI's I can now conclude the design for the UI for my game. As I mentioned above, the UI must consist of a countdown timer and a point scorer which must not obscure the view of any targets in the scene. The design in mind will match this requirement - and will be displayed merely as numerical figures in a vibrant colour so that they are apparent; but not too bright so that they don't detract eyes from the scene. No backgrounds or logos etc will be necessary for the UI as they would also degrade the scene visually which is currently the best element the game has to offer. Simple yet effective is the route to go down - which is also the most appropriate for a casual game.

Monday, 26 September 2011
Game Synopsis
Having now realized the technicalities of producing the game, some of the previous ideas are no longer appropriate. The main element which will no longer be necessary is the "Time Crisis" take-cover system - the opponents will not be firing back at the player, therefore making the feature obsolete.
The targets can however take some form of cover - similar to traditional western carnival shootout games where opponents spin on wooden boards. With this game being more modern game than that, the targets will not be on wooden boards and will as I previously described, will take cover moving behind objects in the scene.
To summarize, the final game synopsis is as follows;
The game is to be set in the western period (the traditional carnival shooter style game) however the modern twist is the addition of sci-fi, inspired by the new hit film, "Cowboys & Aliens".
The scene for the level has a variety of options including the desert, a wild western town or even inside a western saloon. This will be decided upon completion of "initial design ideas".
As hinted above, the opponents will be aliens. The typical "martian" character is currently intended, however as mentioned above with the scene, design ideas will decide the final outcome.
The player is set to be a western cowboy/cowgirl, although with the game being 1st person only their weapon will suggest this.
Therefore the character will be armed with a typical western style rifle, as featured in my research. This may or may not be upgradable - depending on time and technicalities.
The game will conclude once a countdown timer expires, signaling the end of the round and the enemy attack.
Note that changes may be made during the course of the project so the above may become obsolete at a later date.
Subscribe to:
Comments (Atom)